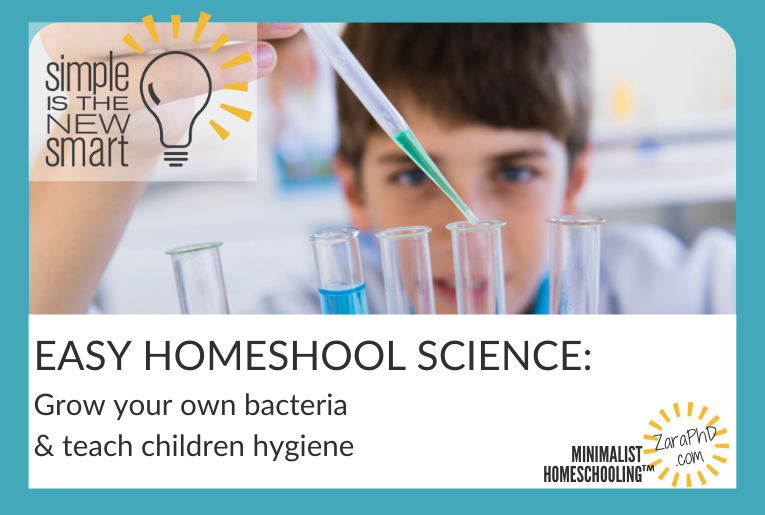
It seems that every flu season, we are reminded by journalists and news outlets to wash our hands. Well, this is where some easy homeschool science comes in: we get to teach our children hygiene right alongside several science concepts, by growing our own bacteria!
My goal in this post (as always) is to convince you that homeschool science is much easier than you think! If you can make jello, you can do this project. If you can read a book (or assign a book for your children to read themselves), or watch a video, then you can teach children hygiene with the best of them. Promise.
My goal, when we do this experiment, is to make an impact on my children so that they will not need the annual hand-washing lesson for flu season when they are 30 year old adults. This is the easiest way I have found to get children to 1) never complain about washing their hands when asked (think: public restrooms), and 2) to understand why you’re reminding them not to rub their hands on everything in sight at the grocery store. Ha!
As a BONUS, this homeschool science lesson is designed to teach children hygiene also teaches several really great, AND PRACTICAL science concepts and methods.
YOU ARE GOING TO HONEST-TO-GOODNESS PLATE BACTERIA
ALL BY YOURSELVES!
First, you’ll want to get a kit for creating agar plates. I know, I know, just the sound of it is daunting for most, but hear me out: they are EASY to make and use! We are going to demystify homeschool science, folks :).
Amazon sells a kit to make 20 dishes (called plates) with agar. Agar is simply a seaweed that , when powdered, and prepared properly, turns into a nice nutrient-rich gelatin-like surface, on which little microbes are happy to grow, if given the opportunity.
You don’t need to buy anything else.
Yes, you can buy pre-poured agar plates, but please resist the urge!!! Honestly, making agar is like making jello. It’s very simple, AND you get to teach so much more when you make your own!
Check-out my video about how to teach about ATOMS to children of all ages.
SCIENTIFIC CONCEPT #1: STERILE TECHNIQUE
When we receive our supplies, they are “sterile.” This means that there are absolutely no bacteria, fungi, parasites or viruses on them while they are in the sealed package. However! Our world is covered in bacteria – a point that we plan to prove in this experiment.
As soon as we open the plates, and the agar, our supplies will be in contact with bacteria that are in the air, on our measuring utensils and mixing containers, AND – this is an important one – on any surfaces we touch!
(Surfaces are never completely sterile unless they are UV-treated, alcohol-treated, and are within a space with negative air pressure. And even then, doctors and scientists try really hard not to touch surfaces any more than necessary).
Sterile technique refers to the specific training that scientists and doctors use to keep things as sterile as possible. Sterile technique relies heavily on:
- being acutely aware of which surfaces and objects are or are not sterile,
- keeping objects within a sterile environment as much as possible,
- sterilizing surfaces as much as possible,
- and avoiding contact of experimental samples with surfaces (including our own bodies) as often as possible to prevent cross-contamination.
SCIENTIFIC CONCEPT #2: CROSS-CONTAMINATION
Cross-contamination literally means taking a contamination (microbes) from one area, surface, or object, and transferring that contamination (microbes) to another area, surface or object.
This means that when we touch one surface, our hand (or object) collects microbes, and then we carry those microbes around with us, and deposit some when we touch the next surface. This is true not only for our hands, but anything that touches anything has the potential to move bacteria from one location to the next thing it touches.
You can see how avoiding microbes during our every day life is really quite impossible. Not only do these microscopic critters live everywhere, but they also stick to, and drop off of all the things as objects move throughout spaces. (But, not to fear, we have great immune systems, and you can follow-up this experiment with the books and video I recommend at the end!)
SCIENTIFIC METHOD

RATIONALE OR PURPOSE:
To determine which surfaces are most contaminated with bacteria, and which are the least contaminated.
MATERIALS:
Agar plate kit (sterile plates, sterile agar powder, sterile cotton swabs)
Boiling Water
Liquid measuring cup
Variety of surfaces
sharpie
HYPOTHESIS
Which surfaces do you think have the most bacteria?
Which surfaces do you think have the least?
PROCEDURE/PROTOCOL/METHODS:
Clean your workspace thoroughly, in order to prevent as much cross-contamination within your experiment as possible.
Prepare agar plates as directed by the manufacturer, being sure to
- only open your sterile packaging when you must,
- NOT open anything before you must open it,
- keep things in their sterile packaging as much as possible,
- keep lids of all containers closed as much as possible,
- and, be extremely careful that you do not ever, EVER touch the inside of the dishes AT ALL. ***Handle only the outside of the lids and plates, do not touch the inside of the lid rim.***
Why? Because your hands always carry bacteria. Always. We will prove it, but just trust me for now.
When pouring the agar in the dishes, open the dish with your non-dominant hand, pour slowly with your dominant hand, and then immediately replace the lid. ***Do not set the lid down on a surface*** (help small children if you must).
Why? Because every surface is contaminated with bacteria.
Once all of the plates have been poured, set them aside to cool. Heat kills bacteria, so if you put bacterial samples on a dish that is still hot, most, if not all of the bacteria will die, making it impossible to accurately quantify the amount of bacteria in various samples.
Once the plates have solidified, you will want to store them upside-down.
The exciting part of this is that you have just created plates exactly the same way that scientists actually do it. This homeschool science experiment is not a watered-down, or kid-version of bacterial plating.
**Perhaps pause here, and continue your homeschool science the next day. **
SCIENTIFIC CONCEPT #3 “SCIENCE WORD OF THE DAY”:
CONTROL SAMPLE
A control sample is a critical part of any scientific experiment. The “control” is the experiment, without any experimenting. Right? The control is a sample that is prepared just like all of the others, but then it is set aside, and no experiment is performed on it.
In this case, you will set aside one plate that has agar as your control. Grab that sharpie, and write “control” on the lid. Do not open the lid at all! Do not plate any bacteria on it. Just let the plate live undisturbed.
Remember that part where we said that bacteria lives all around us? We said that we had to be very careful not to cross-contaminate the plates, right? We practiced sterile technique so that, in theory, that control plate will have NO bacteria in it or on it. Right?
We hope so. The reality is that bacteria are insidious little fellows, and chances are, even your control plate, despite extreme caution will grow some of the little buggers over time.
That’s what we need to find out. How much of the bacteria that you see growing is from the act of making the agar?
Here’s the important scientific concept: by having the control plate, we will know how much of the bacteria is “just because” of ambient bacteria, and how much is because of the specific surface you test. Do you follow? The control basically tells us how much bacteria is naturally in the plate we carefully poured, and we then compare that to how much bacteria is on our experimental surfaces.
This concept may be easier to understand when you are analyzing your results. Especially for young ones.
If you did a terrible job keeping the plates clean, well, all of them will grow loads of bacteria, including the control. In this case, your experiment won’t tell you much, and you will know that’s because the plates were heavily contaminated – not necessarily that every surface tested was heavily contaminated. You simply won’t know how different surfaces compare to one another, and you would have to repeat the experiment.
PROCEDURE/PROTOCOL/METHODS CONTINUED
Once your plates have completely cooled to room temperature, take a single cotton swab from its sterile wrapper, being careful to only touch the handle. The best way to teach children hygiene is to ask them to swab their unwashed hands first.
To collect a sample, rub the swab over the child’s hands (or they can do it themselves). Then, take that same swab, and rub it on a plate. We are deliberately cross-contaminating the plate.
When plating your bacteria, use the same technique that you used when pouring the plates. Lift the lid with the non-dominant hand, smear the swab on the agar with the dominant hand, and immediately replace the lid. Do not set down the lid, or keep the plate open to the air any more than necessary.
***The proper way to “smear” is to move the swab back and forth across the width of the plate, from top to bottom, but avoid touching the sides – almost as if coloring in a zig-zag motion with a marker.***
After smearing, immediately replace the lid. Grab the sharpie, mark the child’s name on the outside of the lid, along with the description “unwashed hands.” Throw away that swab.
Now, in order to teach children hygiene, ask them to wash their hands properly, and supervise proper hand-washing technique: lather with soap for 30 seconds before rinsing.
Now, using a brand-new, unwrapped, sterile swab, swab that child’s hands again. Smear a new plate with this swab in the same manner. Label it with the child’s name and washed hands, and throw away the used swab.
This will show children how much bacteria is on their hands before washing, and after washing!
Next, allow your child(ren) to choose surfaces to test. For each sample, be sure to use a brand-new-sterile swab, and a new plate. Be sure to label plates, and throw away used swabs immediately.
Can you think of reasons to throw the swab away immediately?
(Some correct answers: so you don’t contaminate your workspace with the bacteria on the swab, or so you don’t get the old swab confused with a new one)
It is fun to choose both surfaces that you believe will be very clean, and those that you believe will be very dirty. Your children can also do more “before and after” samples by swabbing an area before it is cleaned, and then using a new swab and plate to test the same surface after is it cleaned.
And remember, if the swab touches anything unintended, or if you accidentally touch the agar with anything other than a swabbed sample, you have contaminated that sample. It must be thrown away, and you must try again. Otherwise, your sample won’t be accurate.
Finally, stack your plates upside-down and store them in a cool, inconspicuous place, away from direct sunlight for a week. It is important to stack bacterial plates agar-side-UP so that any condensation that forms on the lid will not fall in droplets onto the agar and disrupt the bacterial growth.
Peek at your plates (without taking the lids off!) daily to see if your notice anything growing.

RESULTS
On day 5, 6, or 7, to complete your homeschool science experiment, collect all of your plates, and start recording data. Draw the different plates, and the size, shapes, and colors of the spots that your observe on each sample.
We cannot see individual bacteria with our own eyes, but, when bacteria are left in a situation where they can multiply, they create “colonies” over time that are large enough to see with your own eyes.
Quantify which plates had the most bacteria, and which had the widest variety of bacteria.
CONCLUSIONS
Finally, draw some conclusions about bacteria in your world.
Was your hypothesis correct? What was expected?
What was surprising or unexpected?
How effective was hand-washing (or surface washing)?
Why do they believe the different surfaces with less bacteria has less? And why did the surfaces with more bacteria have more?
What additional homeschool science experiments would you do next? Would you consider the effects of temperature, cleaners, or sunlight on bacteria growth, for example?
What questions remain unanswered?
What message would you tell someone about bacteria and hand-washing based on your results?
Read about How (and Why) to Raise Independent Learners
EXTEND THE LESSON
Magic School Bus is an effective way to teach children throughout the elementary school years about the immune system, and how it reacts to “germs.” Note that “germs” is not a scientific term.
Common people say “germs” when they mean “infectious microbes.” Yes. That is a mouthful. But, it literally translates as “microscopic living things that cause illness.” Infectious microbes. It’s worth using the big words every once in a while ;).
TO WATCH:
S1 E3: Inside Ralphie is available on YouTube (at a relatively poor quality, but free) – full-disclosure: they mention “shots” to stay healthy in the last minutes of the episode.
OR, TO READ:
Magic School Bus picture book: Inside Ralphie
Magic School Bus chapter book: The Giant Germ
For older children…
…refer to their biology textbook. I guarantee that there is section on bacteria and microbes – just look in the Index or table of contents. And/or look in a physiology book (or general biology book) for the discussion on the immune system. Again, the immune system is a topic commonly found in the index and table of contents of biology textbooks.
In Middle School, we use Real Science 4 Kids Focus on Biology (it is secular, while recognizing the existing debate, and avoiding controversial subjects like evolution and the age of the earth).
Also, have older kids read these two living books on the subject:
Pasteur’s Fight Against Microbes by B.E.S.
How Did We Find out About Germs by Isaac Asimov
TEACHING NOTES
- Ask your children to repeat definitions/concepts immediately after you explain them. I’ve put those in bold.
- Ask your children to write the “Science Word of the Day” on a blank piece of paper, and then write and/or draw what that word means on the page.
- Record the experiment as formally, or informally as you’d like. My goal is always to have children love science first, and learn science second, because the latter follows naturally from the first. Of course, be sure to meet your state’s homeschool science requirements.
- Have children tell you about what they have learned from the video, books, and/ or textbook on the subject. Listen intently and ask questions. Even questions like, “what was the most interesting part?” or, “tell me the most important thing you think I should know,” help children own what they have learned.
